Sunday, December 30, 2007


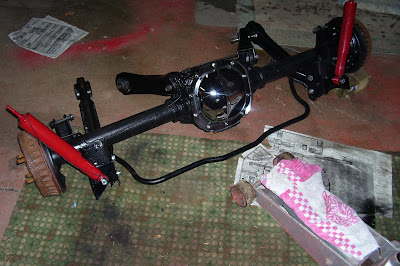
Rear Axle assembly is prepared and istalled over the holiday week. Spring perches are installed along with Axle dampers (quad shocks). An examination of the rear brakes shows there will be work required here.

Sunday, December 9, 2007


The AC brake and clutch pedals re installed. Th easy part: drilling and bolting them o. The hard part: getting the little black rubber bushings installed into the pedal themselves.

The Kit did not come with a Gas Pedal, so I built one myself.

I think it looks pretty good


Brake Master Cylinder, Steering Column Assemby, are installed. It Steers!

Sunday, December 2, 2007


We have floors. The floorboards were installed both driver and passenger. Pop rivits were used to install the panels.


Clutch and Brake Pedal assembly get installed along with the Driver footbox panel.

Brake Calipers get ready, Brake rotors are sent out to the machine shop to be turned. Steering column that we ordered last week was wrong. We are still waiting for the replacement

Sunday, November 25, 2007


Heat in the Garage. As the temperature drops in Northeast Ohio, we can continue to make progress by using this nice little space heater. The Grage is insulated and as long as the outside temperature stays above 20 degrees we can work.

Clutch and Brake Pedals Get Bent! These needed to get bent to provide clearance for the wide of foot to be able to hit the gas pedal without hitting the brake.

Steering rack is installed.


Front Suspension begins to take shape. We ventured into the first of many boxes. I assembled the upper contol arms and shock assemblies. The parts were mated to the Lower control arms from the mustang and attached to the car as you see here.


COnstruction begins. Aluminum Side panels are attached to frame. Firewall is also attached. These panels are attached using pop rivits.

Sunday, August 26, 2007


Transmission and steering rack get some aluminum coating


Photo one shows us using our new favorite tool the needle scaler. Photo two shows the primed rear axle assembly.

Bodywork hits a snag/Driveline work Continues

We hit a little snag on the bodywork. We have completed the bodywork on the body section, however, we need to mount the body back on the car to fit the doors properly. We may still look to get the body in primer before the snow flies. We have shifted gears to start working with the mechanicals. We have cleaned up the rear axle primed it with a rust converting product. The steering assembly is coming along and the transmission has been painted.
Sunday, August 5, 2007


Body work continues, We had hoped to have this work completed, however, perfection takes time.

Engine is coming alog


Work on the engine in prgressing. We have had problems getting the starter off as well as the motor mounts. They are all off after some hard work, New Motor mounts have been purchased, The old ones were shot

Thursday, July 5, 2007


7-5-2007 Engine gets cleaned up, Actual body work begins.


Body is separated from chassis


Bodywork begins by grinding down the seams


Donor car stripped of final parts and heads to the crusher.


We decide on a paint scheme, British Racing Green with the yellow accent as seen on the 1965 Indy 500 winner driven by Jim Clark


Engine comes out of donor